Showing posts with label Barbara Bakes. Show all posts

Monday, November 18, 2013

Pumpkin Soup

This recipe starts with a story:  Early in our marriage, my husband and I were fortunate enough to afford a bi-weekly delivery of a box of local organic produce. One week in late October, we got a small pumpkin. And, honestly, we were totally at a loss as to what to do with it. At the time, I was working full time and my husband was working part time. And one day I came home to discover that he had looked through our "Complete Encyclopedia of Vegetables and Vegetarian Cooking" and found a recipe for pumpkin soup. I'll admit that I was very skeptical. I am not an adventurous eater by any stretch of the imagination. However, given how proud he was of his ingenuity, I grudgingly tasted a small amount. And it was wonderful! Unfortunately, when we tried to make more we discovered that grocery stores didn't carry pumpkins past Halloween! (I think this has changed somewhat in recent years – definitely you can still find pie pumpkins at Trader Joe's until Thanksgiving, and local farmers markets usually have some as well.)

Pumpkin soup is now a family staple. My five year old will eat bowls of it without any prodding – in fact it's one thing I know she'll eat even when she's going through a "picky" phase. To minimize spills and make it easier for her to eat, I ladle hers out before I add the full amount of milk so that it's a little thicker.

I make it all winter long, using fresh pumpkin from the farmers market. I stock up at this time of year when the pumpkins are readily available. They store well for a few months, and I also freeze some of the chunks after seeding and peeling so that I have at least one batch available for late spring. (It may be possible to use a (large) can of pumpkin, but I've never done so. If you try that option, add the pumpkin after the potatoes and onions are finished cooking, before you puree the soup.)

Pumpkin Soup

Ingredients:
1 T olive oil
1 large onion or 2 shallots
1 1/2 lbs pumpkin
1 lb potatoes
1 1/2 c vegetable (or other) stock
1/2 t tarragon
generous pinch nutmeg (optional)
2 1/2 c milk
1-2 t lemon juice
salt and pepper to taste

Equipment needed:
large soup pot with lid
potato peeler
food processor, blender or immersion blender

Directions:
Assemble ingredients.
Cut the pumpkin in half and remove the seeds.
Slice the pumpkin halves in thin wedges as if it were a cantaloupe (trust me; it's easier to peel once it's cut in wedges!). 
Peel the wedges and cut the pumpkin into large dice (approximately 1" square, but exact measurements are not necessary in the least!).
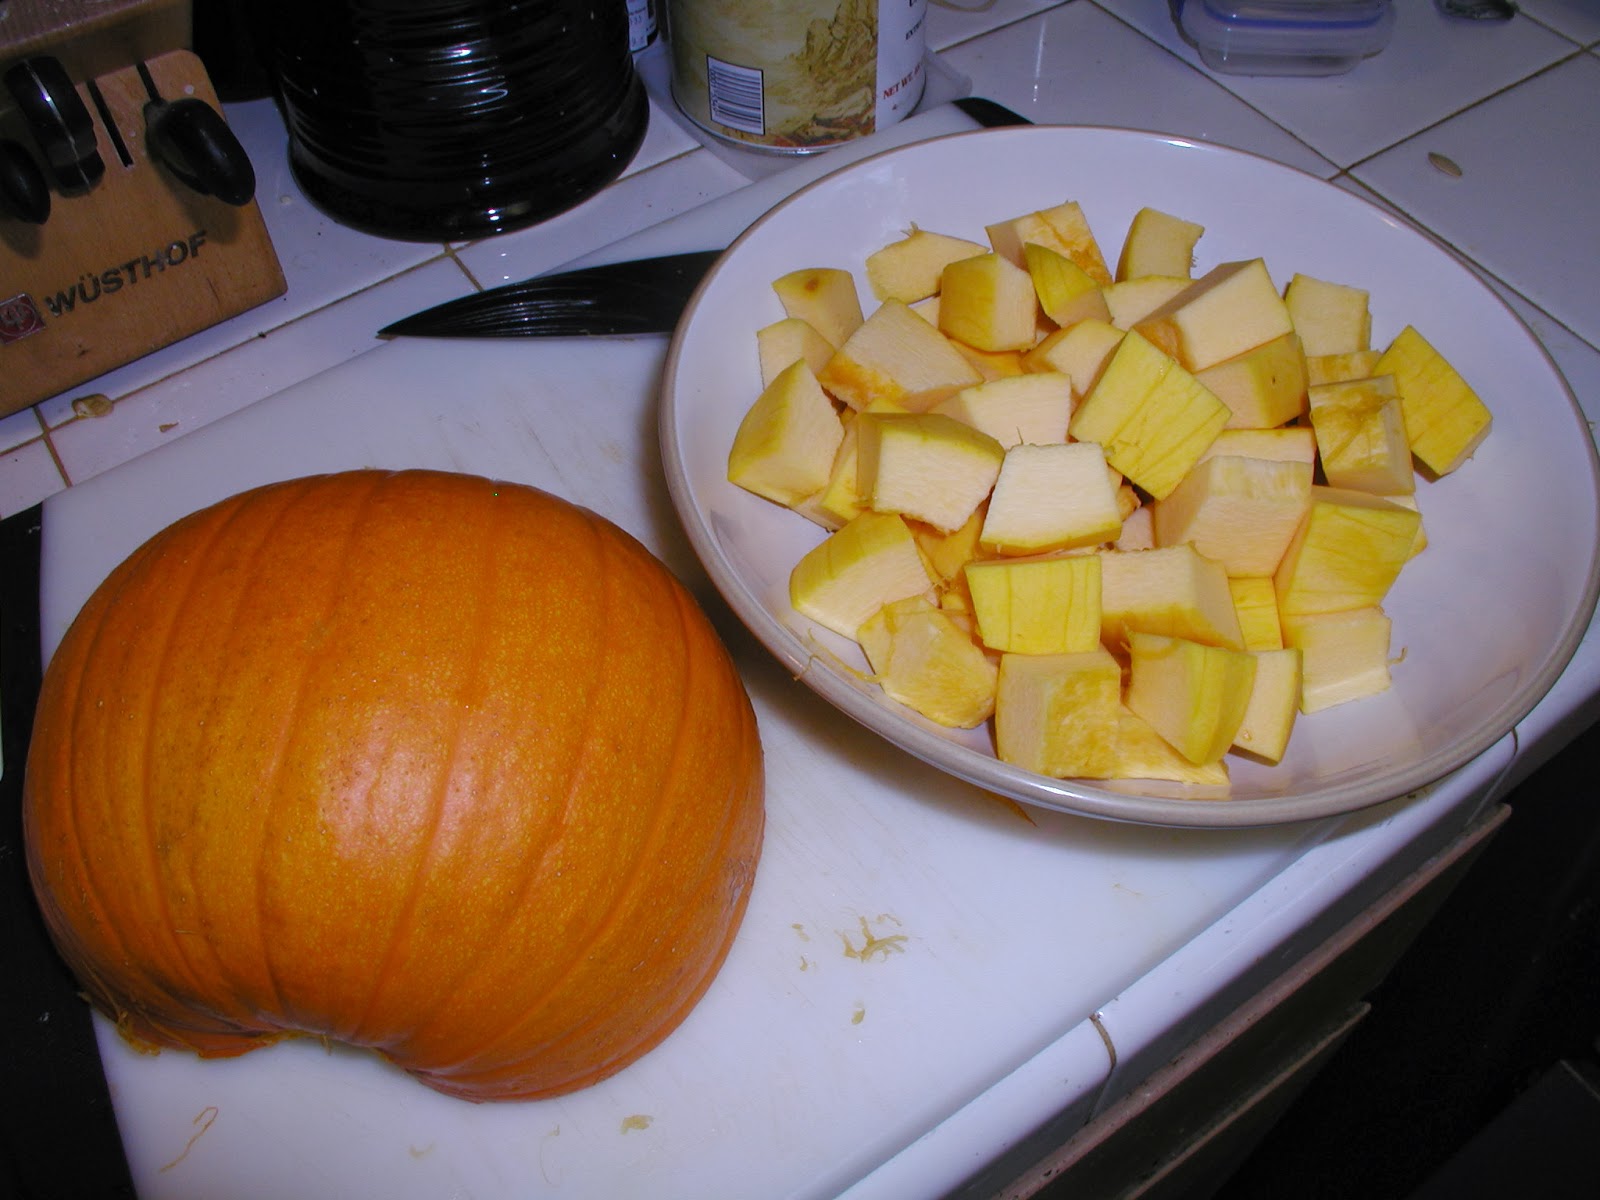
Peel the potatoes and cut them into large dice. You want your potato pieces to be about the same size as your pumpkin pieces. Also chop the onion or shallot into large pieces.
Saute the onion (shallot) in the oil over medium-high heat for a few minutes, until translucent and fragrant.
Add the pumpkin and potato pieces.

Put the lid on and let everything "sweat" for a few minutes. (That means let them cook for a short time in what is essentially steam.) After about five minutes, give everything a good stir, and add the stock. Add the tarragon and the nutmeg (if using).
Cook until the pumpkin and the potato are quite tender – about 20-25 minutes.

Remove from heat and let cool slightly.

Puree everything. You can do this in your blender or food processor, or use your immersion blender. It's up to you and the equipment you prefer. My preference is to use my heavy-duty food processor...

  
...and then to also strain the puree through a conical strainer. (It's totally not necessary to strain it, and my husband thinks I'm a little crazy. What can I say? I like a super-smooth soup, and I learned to strain it this way in my cooking classes.)

Once you have everything totally pureed, and ready to go, put it back in the pan to reheat. Add the milk and the lemon juice and heat over medium heat until warm enough to serve.
Enjoy with warm crusty bread or crackers.

Happy (and warm) Baking!

Monday, November 4, 2013

Peanut Butter

(or other Nut Butter - see note at end of post)

(Please note: to make peanut butter you will either need a food processor or a strong blender (or Magic Bullet.)

You probably know by now that I'm kind of a DIY junkie when it comes to food. So when the organic peanut butter that I've been in love with for years started getting outside my price range, I looked for a way to make my own instead of looking for a cheaper brand. Turns out, it's not that hard, if you've got the right equipment. I use my large food processor, but you could also use a particularly strong blender or a Magic Bullet or equivalent. Anything strong enough to puree nuts.

When I started searching, I looked all over for a source for organic raw peanuts, but as you may remember, there was a big salmonella outbreak a few years ago that was linked back to peanut butter. So you can't buy raw peanuts any more. They have to at least be blanched if they're not roasted. (Yes, it would be possible to grow my own, but I don't think I'm quite ready to go that far.) Eventually I settled for blanched because it's a close to raw as I can get.

I buy my peanuts through my aunt's health food store in a 30 lb bag. (I divide up the 30 pounds into smaller packages and store them in the freezer so they don't go rancid before I use them.) The 30 lb bag lasts me for about 5-6 months, but I also use a LOT of peanut butter because I make granola bars once a week.
The peanut variety that you use for your butter is entirely up to you. Variety will affect both taste and texture of your finished product, so you can experiment with different types if you like, or just go with the most convenient. I have been fortunate that the variety I buy is particularly good for making peanut butter, meaning it releases its oil relatively easily and creates a pretty smooth product.

Because there are very few ingredients, I'll just write this recipe in narrative form.

Start by filling your food processor or blender with peanuts. (I've found that I actually have better results if I start with frozen peanuts, but if they're not frozen don't worry, it'll still work.) Sprinkle a little salt over the nuts. Push start.

IT WILL BE LOUD. Earsplitting. Run-away-with-your-hands-over-your-ears noisy. Give it a minute and the noise will subside as the peanut pieces get smaller.
Eventually, you'll reach the point where the food processor doesn't seem to be making any progress. You'll have a big blob of chopped up nuts that don't want to go any further. At this point, I let everything rest for about 30 minutes. (You don't have to...you could just push on and eventually you'll get the mass to puree, but I find that if I let it rest, it's a whole lot easier.)
Turn it back on. Gradually the mass will begin to liquidize as the nuts release their oil. 
 If you like smooth peanut butter, keep going for several minutes until everything smooths out. 
If you like chunky peanut butter, you can stop sooner, but your peanut butter may be more difficult to spread because the oil won't have been fully released. You can add a little peanut oil, if you like, or you can process everything to smoothness and then add some chopped nuts (the latter is the way “they” actually make chunky peanut butter).

If you prefer your peanut butter sweet (I really really don't!), you can add a little honey – just start with a little bit, and add more to taste. Taste for saltiness as well, and add more if you want to.

Transfer your peanut butter to a container and enjoy!

Note:
Since I first planned to write this post I've been diagnosed with a mild food allergy to peanut butter. Fortunately, the allergy level I have is by no means life threatening, and might not really be affecting me physically at all, but it still means I've been experimenting with alternatives. If you have a peanut allergy in your family, you can follow the same method above to make pretty much any nut butter – although so far I've only tried almond. I had to add just a little oil (I used coconut oil, and the result was amazing), and the resulting almond butter is somewhat gritty due to the almond skins, but it's definitely a good peanut butter alternative once you get used to the different texture. I experimented with blanching some almonds to use instead, hoping the texture would be more like peanut butter, but I ended up with almond paste instead of almond butter (too much moisture!). Experiment with your own and see what you come up with!


Monday, October 21, 2013

Cream Scones

This recipe comes from one of my baking classes at American River College. Of all the recipes I very specific about the cream that you use. It calls for Manufacturing Cream, which is basically heavier-than-heavy whipping cream. The only source for it that I've found is Smart and Final, where you can only purchase it in a ½ gallon carton. That amount works great when I'm making two quadruple batches of scones for Sunday morning coffee time at church, but it's not so good when I only want scones for breakfast. Substituting heavy whipping cream for the manufacturing cream means I have to add a little more flour and the resulting scones aren't quite as tender, but they're good enough. And it's that substitution that I'm passing on.
learned while getting my pastry certificate, this is the one I use the most - and it's one I get asked for frequently. Unfortunately, the original recipe is

The basic scone recipe can be made into pretty much any variation (flavor) that you want. For instance, I frequently make coconut macadamia chocolate chip scones. Other favorites are (plain) chocolate chip, cranberry pecan, and apricot almond. Pretty much any dried fruit or nut can be used in the ¼ c of “stuff”. (And really, ¼ c is just a guideline – I almost always use more than that!)

Cream Scones
Ingredients
1 cup flour
2½ t baking powder
½ t salt
¼ c sugar
¼ c “stuff” (chocolate chips, dried fruit, nuts, etc.)
¾ c heavy cream

Instructions
Assemble ingredients.
Preheat oven to 425°. Line a baking sheet with parchment or wax paper. (The lining is necessary unless you happen to be using a baking stone, and even then it's a good idea.)

Combine all ingredients except cream in a large bowl. Whisk together a few times just to make sure everything's well mixed.
 Add cream and mix gently with your hands until it all comes together. (Yes! Use your hands! A spoon or spatula will not get everything mixed, and a mixer will make your dough really tough.)
Turn the dough out onto a lightly floured surface and knead a few times until the dough feels somewhat stiff. To knead, pat the dough into a squarish lump, 
then fold it in half. 
Pick up the dough, turn it sideways, and repeat.

Pat into a circle or square.
Cut into pieces.
Transfer pieces to baking sheet and bake for 10-12 minutes, or until lightly browned.
After a minute or two, slide the parchment off the pan onto the rack.  Let the scones cool for a few more minutes before taking them off the parchment.

The scones are at their absolute best while still warm from the oven, but you can serve them any time with an hour or two.  They can be stored for a few days in an airtight container, but they will lose their flaky perfection quickly.   It is possible, however, to make the dough the night before and store in the refrigerator, or even a week or so beforehand - store, well wrapped, in the freezer.  If you've frozen the dough, you should let it thaw before cooking.

Happy Baking!

Monday, October 14, 2013

Brownie Cookies

I keep double checking to make sure I haven't posted this recipe before.  But nope, I haven't! That's hard for me to believe, because these are hands down my favorite cookie. Totally decadent, they're deeply chocolate, slightly gooey, and filled with dark chocolate chips and macadamia nuts. Don't count the calories...these are for special (or emergency) occasions when rich chocolate indulgence is called for.

Last December I experimented with making these more festive by adding candy cane pieces...I added about 1 c of chopped candy cane and omitted the nuts. Those were pretty yummy too - perfect for holiday cookie exchanges!

An important note: this recipe calls for semisweet chocolate morsels (chips). The total amount (18 oz or 3 cups) is divided in half – with 9 oz (1½ c) being melted into the batter and 9 oz (1½ c) added as chocolate chips. Now, I'm not a huge fan of semisweet – I much prefer something darker. However, when I have subbed bittersweet chocolate chips for the entire amount, the cookies are way too dry. (This happens because bittersweet chocolate contains more cocoa and less cocoa butter – or other fat – than semisweet, meaning the batter itself contains less fat, and is therefore drier.) To prevent this, I've started using 9 oz semisweet chocolate to melt into the batter, and one bag (10 oz, but more is better, right?) of Ghirardelli Bittersweet Chocolate Chips. This will be evident in the pictures below!

Brownie Cookies
(adapted from the Southern Living Incredible Cookies book)
(makes about 3 dozen)

½ c unsalted butter
4 (1-oz) squares unsweetened chocolate, chopped
18 oz (3 c) semisweet chocolate morsels, divided (or 9 oz semisweet, and 1 bag bittersweet chocolate chips)
1½ cups all-purpose flour
½ tsp baking powder
½ tsp salt
4 large eggs
1½ cups sugar
2 tsp pure vanilla extract
2 c chopped macadamia nuts

Assemble ingredients.
Chop chocolate. (Chocolate chips don't need to be chopped, but chopping the unsweetened chocolate will make it melt more quickly with the other ingredients.)  Remember, when you're chopping chocolate, that chocolate picks up other flavors really easily!  Don't use a board that you recently chopped onions on.
Combine butter, unsweetened chocolate and 9 oz (1½ cups) chocolate morsels in a large heavy saucepan. Cook over low heat, stirring constantly, until butter and chocolate melt. [You can also do this in the microwave if you stop and stir it frequently.] Cool.
Combine flour, baking powder, and salt in a small bowl; set aside.
Beat eggs, sugar, and vanilla at medium speed with an electric mixer. Add dry ingredients to egg mixture, beating well.
 Add chocolate mixture; beat well.
Stir in remaining 1 ½ cups chocolate morsels and macadamias, if desired.
Drop dough by 2-tablespoonfuls 1 inch apart onto parchment paper-lined baking sheets. (Yes, it is a very good idea to line your baking sheet for these cookies. Parchment or waxed paper will make it MUCH easier to remove the cookies from the sheet after they're cool!)
Bake at 350 for 10-12 minutes.

Remove the parchment from the pan as a whole sheet and place on a wire rack. 

After a few minutes, remove the cookies from the paper and cool completely on a wire rack.

Enjoy!

Happy Baking,

Monday, October 7, 2013

Granola

Granola is one of those things that my mom used to make, and I liked it, mostly, but I never thought that I'd be making it myself. After all, I don't usually remember that I like it until I'm actually eating it. But a few years ago, when I started making my husband's lunch on a regular basis, he asked for some to go with the yogurt I put in. After reading the ingredients list on store-bought granola, I decided it'd be both cheaper and healthier to make my own!

So I looked up a recipe in the “More-with-Less Cookbook”, a book I remember my mom using all the time, and of which she had given me a copy when I moved out on my own. Its subtitle is “suggestions by Mennonnites on how to eat better and consume less of the world's limited food resources” (original copyright 1976). For the last couple years, the only recipe I've used out of it has been this granola recipe, but in writing this little description I was flipping through the book. It's full of whole grain recipes! Since I've been trending that way in my cooking, it looks like I need to explore this cookbook a little more thoroughly. (Maybe another of its recipes will find its way to this blog.)

At any rate, this granola is pretty simple (in fact that's its title in More-with-Less: “simple granola”). The nuts (which I always include, because I like them) are optional. Feel free to experiment with other things too: add some seeds, add some cinnamon, add other whole grain. You could add some dried fruit or chocolate chips too, but wait until after cooking. Fruit would get too dried if it's cooked with the granola, and chocolate would melt everywhere and make a big mess.

Simple Granola
(from “More-With-Less Cookbook” by Doris Janzen Longacre)

Ingredients:
1 c whole wheat flour
3 c rolled oats
½ c coconut
½ c wheat germ
1 c chopped nuts
¼ c water
½ c vegetable oil
½ c honey
1 t vanilla
½ T salt

Directions:

Assemble ingredients. Preheat oven to 250°.
Combine flour, oats, coconut, wheat germ and nuts in a large bowl. Set aside.
In a smaller bowl, thoroughly combine remaining ingredients (water, oil, honey, vanilla, salt).
Pour liquid ingredients into dry ingredients and mix very well.
Spread out evenly on a lightly greased cookie sheet.
Bake for 1 hour or until dry and golden.
Immediately after the granola comes out of the oven, stir it with a large spatula to break it up into smaller chunks. If you do not do this immediately, it will be hard to break up the granola and you'll have either very large pieces or powder.
Let cool completely and store in an airtight container.


Happy Baking!


Monday, September 30, 2013

Chocolate Wafer Cookies

Here's another recipe that I make all the time. My husband loves these wafers (especially the variation made with cinnamon and cayenne – that's why you'll see those ingredients in the pictures below), and they're quick to make, so they're frequently what I make for his lunch.

This recipe showcases the cocoa powder that you use, so pick the best one you can afford!  I've used this recipe to demonstrate the differences between various brands (and types) of cocoa when I've hosted chocolate tastings, so I can say with authority that the cocoa you choose will greatly affect the taste of the cookie. The biggest difference is between natural and Dutch-process cocoa – within those two types the differences in brands are less noticeable. If you use Dutch-process cocoa you'll get something that tastes more like a certain famous sandwich cookie. Natural cocoa yields a cookie that's lighter in color and milder in flavor.  I highly recommend experimenting until you find your favorite.

For these cookies you make the dough, roll it into a log, and refrigerate it for an hour or so before slicing it into rounds and baking. You'll need about 15 minutes to make the dough, and about 20 minutes to do the baking, with at least an hour in between for chilling the dough.

Chocolate Wafers
(adapted from Bittersweet, by Alice Medrich)

Ingredients:
1 cup all purpose flour
½ cup plus 1 Tbsp unsweetened cocoa powder (natural or Dutch-process)
¼ tsp baking soda
¼ tsp salt
6 tbsp unsalted butter, slightly softened
½ cup packed brown sugar
½ cup plus 2 Tbsp granulated sugar
1 tsp pure vanilla extract
3 Tbsp water or milk

Variations:
  • Cinnamon chocolate wafers – add 1 T cinnamon to the dough
  • Cinnamon spice wafers – add 1 T cinnamon and ¼-½ t cayenne pepper to the dough

Directions:
(Do not heat the oven! This dough needs to chill before baking!)

Assemble ingredients.
In a medium bowl, whisk together the flour, cocoa, baking soda, salt and cinnamon. Set aside.  (Note:  I like to sift mine because my cocoa inevitably has huge lumps that don't come out with just whisking.  Whether you whisk or not is totally up to you!)
In a medium bowl, beat the butter with an electric mixer until creamy. Add the sugars and vanilla. Beat on high speed for about 1 minute.
Beat in the water or milk. On low speed, beat in the flour mixture just until incorporated. 
  Once the dough sticks together
 Gather it together with your hands and form it into a neat, 9- to 10- inch log. 
Wrap it in wax paper or saran wrap, folding or twisting the ends of the paper without pinching or flattening the log. Chill for at least 1 hour, or until needed. (The dough can be refrigerated for up to 3 days, or double-wrapped and frozen for up to 3 months.)

When ready to bake:
Preheat the oven to 350ยบ. Lightly grease two baking sheets.

Use a sharp knife to slice rounds of chilled dough about ¼ inch thick. 
Place them 1 inch apart on baking sheets. 
 Bake for 8 to 12 minutes, baking one sheet at a time.  If you like chewy cookies, slightly under-bake them (about 8 minutes). If you like crunchy, go for the full 12 minutes. Crunchy cookies are also easily crumbled up for a chocolate crumb crust.

The cookies will puff and crackle on top, then settle down slightly when done. Use a metal spatula to transfer the cookies to wire racks to cool completely.


Store in an airtight container for up to 2 weeks, or freeze for up to 2 months.

Happy Baking!